Experienced Foundation Repair Specialists

Category Archives: concrete repair

Five Steps for Effective Concrete Repair

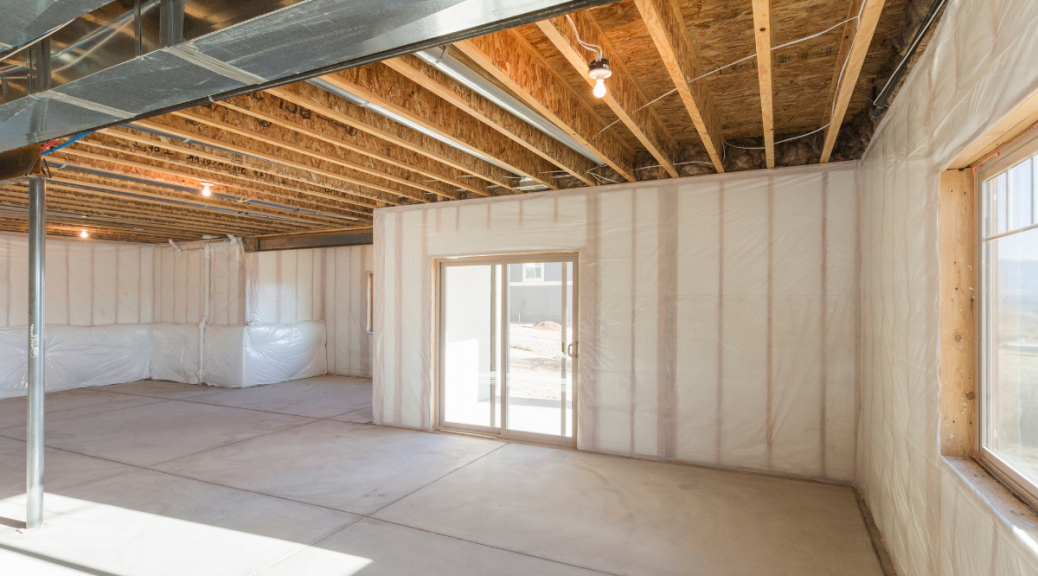
Concrete is a durable and widely used building material known for its strength and longevity. ***

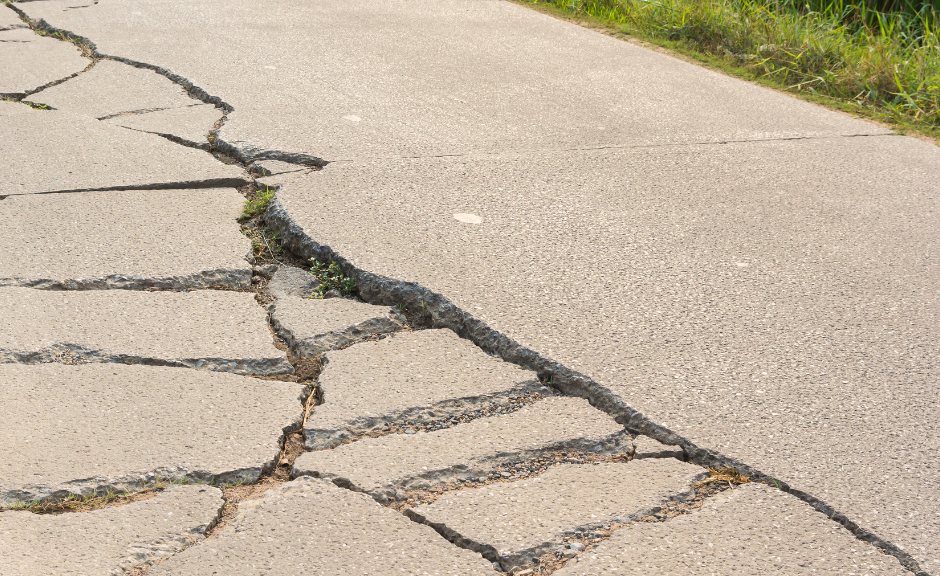
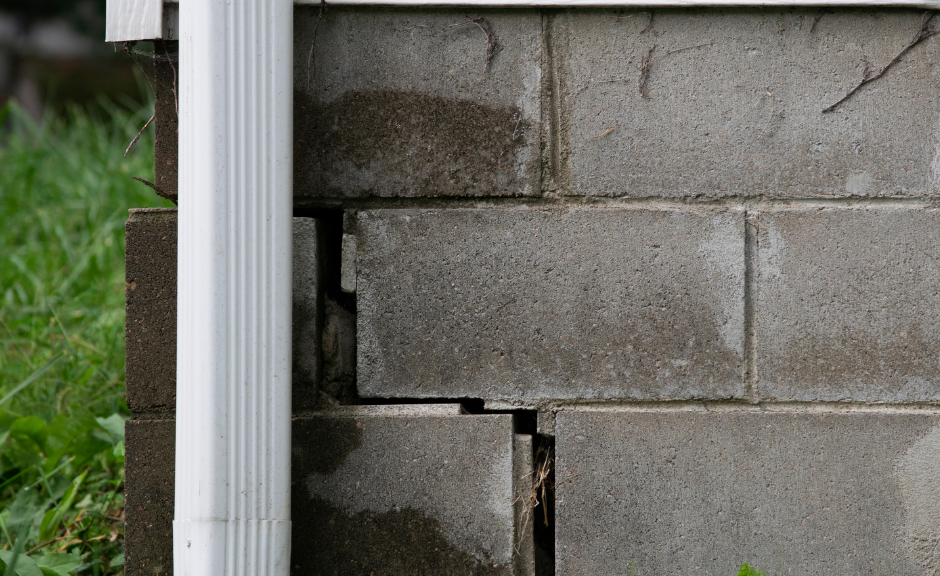
However, years later, concrete structures may develop cracks, spalling, or other forms of damage due to factors such as age, weather conditions, or poor-quality construction. Timely and effective concrete repair is needed so that structural integrity can be restored and also prolong the lifespan of the concrete. 

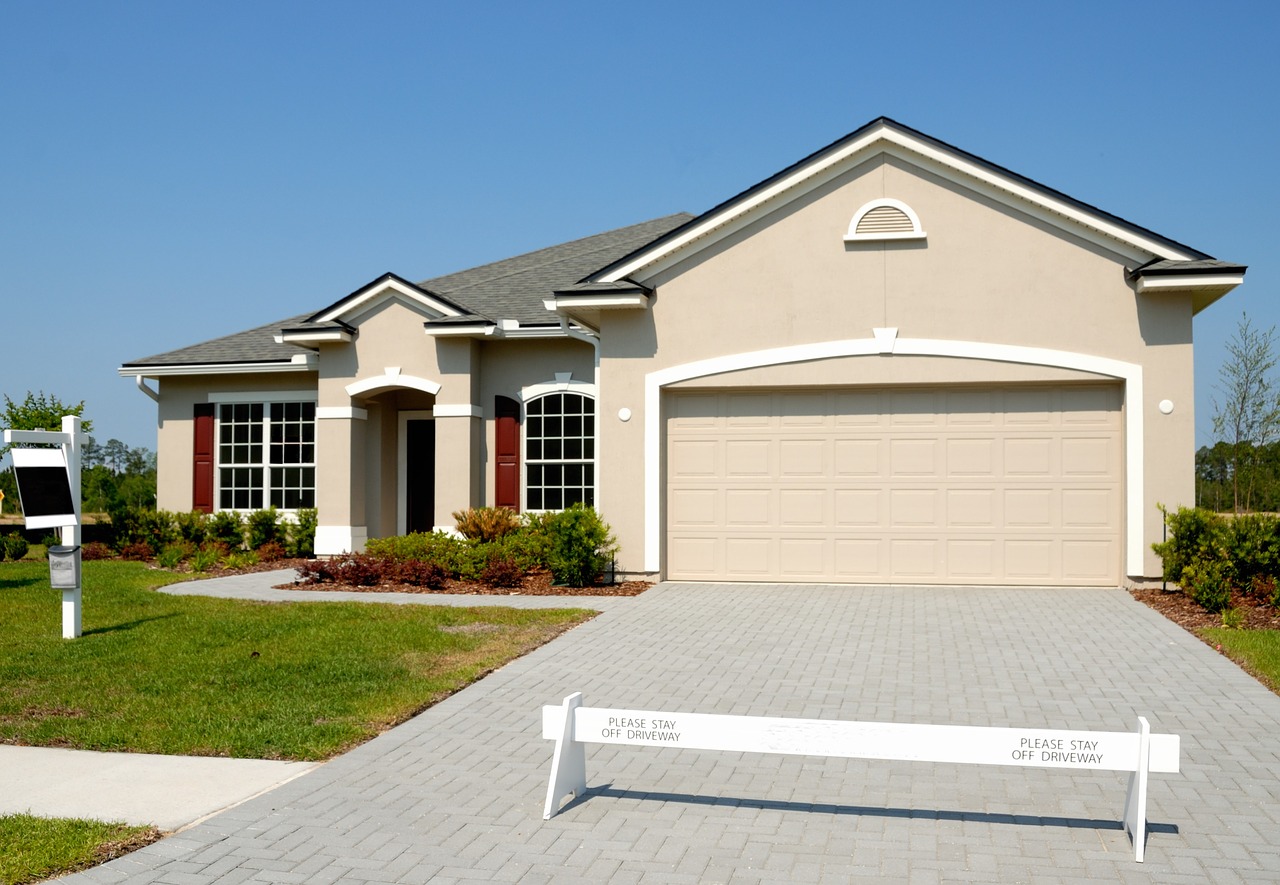
So, if you or a home structure repair contractor has evaluated the concrete around your home, here are five steps you should take for effective concrete repair.  

Step 1: Evaluate the Damage

Before beginning any concrete repair project, the extent and cause of the damage must be assessed. Inspect the concrete surface and identify areas with cracks, deterioration, or other signs of distress. The underlying cause of the damage, whether it’s due to structural issues, moisture infiltration, or freeze-thaw cycles, will determine the correct concrete repair method.

Step 2: Clean and Prepare the Surface

Proper surface preparation is crucial for effective concrete repair. Clean the damaged area using a wire brush, pressure washer, or other suitable methods to remove loose debris, dirt, and contaminants. For larger sections, use a hammer and chisel or a concrete grinder to create clean edges and ensure a solid bonding surface. Thoroughly dry the area before proceeding with the repair.

Step 3: Choose the Right Repair Method

Depending on the nature and severity of the concrete damage, different repair methods may be employed. Some common concrete repair techniques include:

Crack Injection: For hairline cracks or cracks that are actively leaking, crack injection is often used. Inject specialized epoxy or polyurethane materials into the cracks to seal them and restore the structural integrity.

Patching: Patching is suitable for repairing small areas of concrete damage, such as spalls or surface defects. Apply a concrete patching compound or mortar mix to fill the damaged area and create a smooth surface.

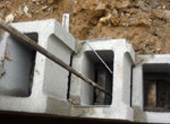
Overlay: When the damage is more extensive, an overlay may be applied. Place a new layer of concrete or a polymer-modified material over the existing surface to restore its strength and appearance.

Resurfacing: Resurfacing is typically used for large areas with widespread damage. Remove the top layer of the concrete and apply a new layer, often with improved properties such as increased durability or decorative finishes.

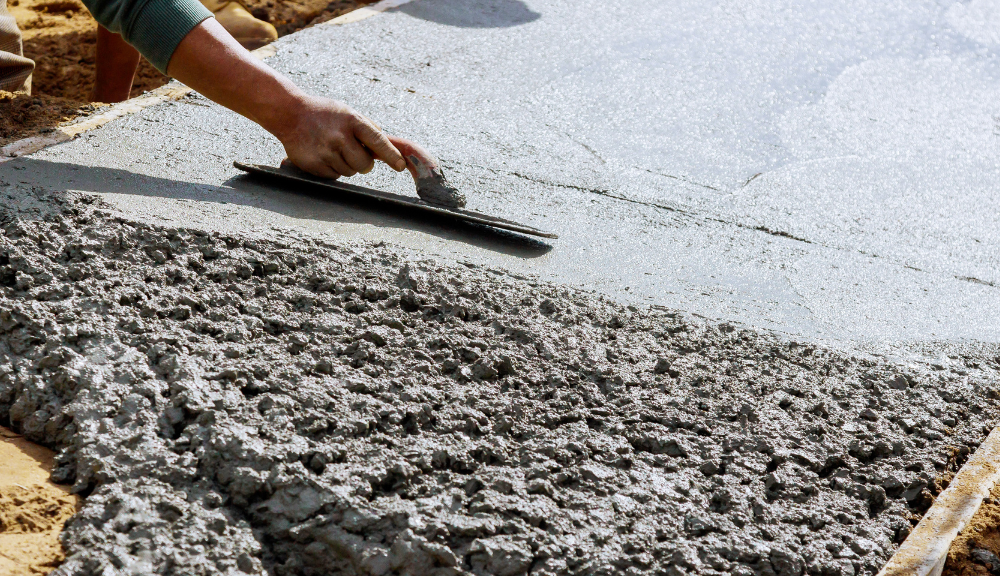
Step 4: Follow Proper Application Techniques

To ensure a long-lasting and effective repair, it’s important to follow the recommended application techniques for the chosen repair method. Follow the manufacturer’s instructions for the repair materials, including mixing ratios, curing times, and application temperatures. Compact and shape the repair material, ensuring a strong bond with the existing concrete. Use appropriate tools and techniques to achieve a smooth and uniform finish.

Step 5: Implement Preventive Measures

After completing the concrete repair, it’s essential to implement preventive measures to minimize future damage. This may include applying sealants or coatings to protect the repaired area from moisture, chemicals, or weathering. Regular maintenance, such as cleaning, sealing, and addressing minor cracks or defects promptly, can help prevent further deterioration and extend the lifespan of the repaired concrete.

Effective concrete repair involves a systematic approach that includes evaluating the damage, preparing the surface, choosing the right repair method, following proper application techniques, and implementing preventive measures. By taking these steps, you can restore the structural integrity of the concrete, enhance its appearance, and prolong its service life. If you are unsure about the best approach or if the damage is extensive, it is recommended to consult with a professional home concrete repair contractor for a successful repair.

M Taylor Enterprise can inspect the concrete around your home to see if you have any home structural issues. Call our home foundation and structural repair experts in Maryland at (301) 649-3406 or matt@mtaylorenterprise.com. We will do a free consultation, make recommendations, then do any needed repairs quickly and efficiently. 

We serve Montgomery County, MD, parts of Prince George’s, MD, and Howard County, MD.

*** For more on how concrete is made, visit the Family Handyman website.

How to Use Carbon Fiber Straps to Repair Foundation Cracks

As winter approaches, you may have noticed that there are cracks in and around your home foundation. They may be hairline cracks or large cracks. Regardless, they will increase in size and cause problems with your home as we have covered in previous blogs

However, your home foundation cracks may be at the point of no return. Now, maybe the time to contact a home foundation repair company to have those cracks repaired. Your home foundation repair contractor may recommend using carbon fiber straps to improve the foundation. 

How do these cracks occur? Home basement foundations are exposed to many hazards underground. Water can be the most significant hazard. Living in a low water table region, the soil gets saturated with water. That water pools around the foundation walls. The water pressure eventually pushes against the foundation. Soil also can be an issue as it expands. It absorbs a lot of water. The water pressure pushes against your basement walls and causes them to bow. Water must be kept from soaking into the dirt near the home foundation.

Carbon Fiber Strips are four times stronger than steel and typically outperform most forms of foundation repair tools. They are smart home foundation repair solutions for the following reasons: 

  1. Carbon fiber strap: Being four times stronger than steel, carbon fiber straps are lighter, more efficient, and less expensive. The epoxy rivet technology makes sure the strap will adhere to the wall and stay attached for many years.
  2. Top anchor: The top of the carbon fiber strap connects to the rim joist. This is where the foundation wall meets the first or main floor. It’s post-tensioned for maximum strength.
  3. Bottom anchor: The bottom of the carbon fiber strap is anchored into the foundation floor, so the wall won’t slide inward. 
  4. Carbon fiber dowels/pins may also be installed inside basement corners to “pin” the wall together. They may also be used against the flat face of a wall to keep the structure together as additional support. These are not as commonly used as other carbon fiber home foundation repair tools. 
  5. Carbon fiber straps are fastened to compromised basement walls and corners. If the crack is in the corner of the basement, it’s possible that both walls can move inward or even collapse. Most home foundation repair contractors install straps horizontally around the corner, four feet in either direction so the wall is structurally secure.

Installation of these carbon fiber straps can be completed efficiently, often in only a few hours. So, you would not have to vacate your home, nor would your daily lifestyle be inconvenienced. If you are considering solutions to your home foundation cracks, and soon before the snow and ice hits Western Maryland.  

If you need carbon fiber foundation repair or basement waterproofing, M Taylor Enterprise home foundation repair contractorscan consult in Prince George, Montgomery County, and Howard County, MD. If you have seen any of these cracks in your home foundation, call our home foundation and structural repair experts in Maryland at (301) 649-3406 or matt@mtaylorenterprise.com. 

We will do a free consultation, make recommendations then do any needed repairs done quickly and efficiently. 


Concrete Repair 101: Why Your Concrete Walkway Is Uneven

No matter how old your house may be, it is deteriorating. I know that sounds common-sensical, but it’s a fact of life. You will always have some repair coming or one going on now. 

One part of your home that you may not notice at first is your concrete walkway. It is used every day and takes a pounding from weather and usage. Eventually, the walkway will deteriorate and become uneven. There are several reasons why this has occurred:

  1. Tree roots: Trees and bushes can have large roots. These roots grow under the walkway and push up against both the driveway and the sidewalk. Roots can even break through thick pipes and cables. Depending on the soil and drought conditions, tree roots push up concrete slabs. They become uneven and can also crack or shift. This is a tripping and falling hazard. If it’s the driveway, the shifts and breaks may make it difficult to park or safely drive in and out of the driveway. 
  2. Weather: The sidewalk and driveway are daily exposed to the elements. Weather can be brutal from extreme heat to extreme cold. We see both in Maryland from ice to floods to droughts. We see it all. That variation in extremes causes the soil under the walkway to be washed away. Water can also drag particles out of the soil. The walkway may sink or settle unevenly. shed away. 
  3. Changes in the soil. Though concrete is strong, it will not hold its weight unless it’s reinforced. Most concrete used in sidewalks and driveways is placed directly on the soil. Once the soil shifts, expands, contracts or washes away, this can cause major damage to your sidewalk or driveway. During the drier seasons, the soil shrinks while during the wetter months, the soil expands. Movement occurs in the soil during these extremes, making the concrete sit unevenly or tilt.
  4. Weight. Driveways and sidewalks are designed for parking and walking. They get used often and will wear out. Excessive weight will make driveways and walkways sag. But it isn’t just automobiles and people. Moving pods, storage containers, and packed vehicles can also tilt and crack. The longer these vehicles or containers sit on the driveway, the more likely they will crack. 

If these cracks and tilts are not repaired, they can be a major hazard. Your home foundation repair contractor should be contacted. They may mud jack it. This process is where holes are made in the concrete, down to the base, and the space is filled with a slurry compound. This compound lifts the base of the concrete back to its original position. It’s not always successful if the cause of the uneven walkway is soil issues. 

If you are seeing cracks in your walkway or driveway, contact M. Taylor Enterprise for an inspection. We will analyze it and make recommendations. Our experienced concrete repair team will make the necessary repairs. We specialize in all types of concrete and masonry. When we do masonry repairs to an existing structure, we go out of our way to match the mortar color. Contact us at (301) 649-3406 or at matt@mtaylorenterprise.com for a free consultation.

We serve the the Montgomery County, Maryland area.

Concrete Repair 101: How you repair a concrete home foundation

As we have discussed in this blog many times, it is common to have structural damage in your home’s foundation. *** It may be an older home or a newer home. It doesn’t matter as damage from aging, weather or even poor workmanship can occur and the need to repair the concrete is immediate to protect it from further damage. 

So, if you see cracks in the interior or exterior walls, you have home foundation damage. Other signs include uneven floors in the garage or basement. Windows that do open or close properly or there are gaps between the doors and door frames. (This includes garage doors.)

We have several methods to repair your concrete home foundation. Those methods include:

  1. Helical  pier underpinning 

  2. Carbon fiber straps

  3. House Underpinning: with  concrete

  4. Steel pilaster bracing

One or all of these concrete home foundation repairs can be made. It depends on what your home foundation repair contractor recommends based on the construction of your home, total concrete damage, and type of soil. We recommend you call a licensed, experienced home foundation repair contractor for a thorough consultation.

M Taylor Enterprise can inspect your home foundation to see if you have any basement waterproofing issues. Call our home foundation and structural repair experts in Maryland at (301) 649-3406 or matt@mtaylorenterprise.com. We will do a free consultation, make recommendations then do any needed repairs done quickly and efficiently. We serve the  Montgomery County, parts of Prince Georges and Howard Counties.

*** Please refer to an earlier blog about home foundation repair here


Red Flags: When Your Home Masonry Needs Repair

If you have owned a home for any period of time, you know it needs care and maintenance. Whether it’s a masonry home built in 1925 or 2015, it will need repairs to its structure and foundation, sooner or later. You can count on it.

So, it’s good to have your eyes peeled and even inspect your masonry home and foundation on a monthly basis to see if there are problems. It doesn’t need a trained home masonry contractor eyes, either.

masonry repairs M Taylor Enterprise

In fact, there are several red flags you can see for yourself that may indicate that your home needs masonry repair:

    1. Mortar missing: Brick walls usually need to be re-pointed or repaired every fifteen years. Joints need to be filled with mortar.
    1. Masonry cracks: These would be cracks in the brickwork and masonry and these are serious. Even a small, thin crack can cause damage.
    1. Water infiltration: Water enters the home through cracks in the foundation and walls. Persistent exposure to water weakens the concrete and eats away at the mortar between bricks and concrete blocks.
    1. Interior problems: In a previous blog, we have detailed the many interior structural problems that occur from foundation issues: windows and doors that don’t close, water stains on walls and musty smells.  
    1. Problematic mortar joints: Mortar joints are the spaces between the concrete and the stone. After several years, those joints begin settling thus causing slanted or cracked mortar joints.  
    1. Chimney breaks and cracks: Chimneys that are deteriorating are a fire hazard. And, that deterioration can be seen. A rusted damper, cracks in chimney, blue tile bits piling up at the bottom, flaking brick or mortar breaking down.  
  1. Shoddy workmanship: If the home masonry contractors used inferior building materials, those can also cause cracks and breaks in the foundation and walls. In time, the foundation has uneven settling causing masonry damage. Vermin, rodents and in insects will then eat through the concrete and mortar unleashing serious damage.   

If you see any of the above issues, you need to consult a licensed home masonry structural or basement waterproofing contractor. The contractor will find matching bricks or mortar to replace the damaged sections of your home.

M Taylor Enterprise has licensed, experienced home masonry contractors who can do a consultation and then do the needed repairs, efficiently and help you improve the quality and appearance of your home in the Montgomery County, MD, Silver Spring , MD or Washington, D.C. area. Call us at (301) 649-3406 or email us at matt@mtaylorenterprise.com.   

Driveway Maintenance: Proper Concrete Driveway Construction

We take for granted so many things in our life: air conditioning, car engines, microwaves, laptops…chocolate.

One thing we definitely take for granted, and we see it every day, is our driveway. Yes, our driveways serve us in so many ways. We park our cars on it, our kids play on it, we wash our cars on it and the value of our homes is enhanced by it. Our driveways are an integral part of our  home.

However, before you can do all the activities you do with your driveway, it first has to be constructed. Driveway construction is a precise and specialized service done by licensed driveway pavers. 

Proper driveway construction step-by-step process is the following:

  1. Plan your driveway: Not all driveways are created the same. You have many factors to consider: how many cars will you park on it, will you be able to turn it around on the street, will it match other homes in the neighborhood, how will your neighbors be affected by it, what needs to be removed on your property so the driveway can be installed, how steep will it be so there is no erosion and it will be safe to enter and exit your vehicle on it. (You may want to get a consultation from one or several driveway construction contractors before agreeing on a final plan.)
  2. Hire a driveway contractor: Once you have planned it, hire a licensed concrete driveway contractor. You may want to get several bids and referrals before making a final decision. Also, find out how long it will take to do the project and if your neighbors will experience and inconveniences. Once you have agreed to a contractor, get it written down on a contract. Make sure you have the financing secured and arrangements made for clearing the land (if needed) so that the concrete paving contractor can begin the project on time.
  3. Get a building permit: Now that you have the bids and the project is imminent, get a building permit from your local government authorities. Utility lines, wells and runoffs have to be considered and approved before starting. Once approved, you may have to display the permit during the driveway paving.
  4. Layout begins: Now, the concrete paving contractor can begin the real work! They will layout the entire section planned for your driveway by placing wooden or steel stakes where the driveway will egress the street and at the end or closing point near the home. Builder’s line is then tied on so it’s now easier to see how the new driveway will look.
  5. Dirt, rocks and vegetation are removed: Now that the layout is clear, the contractor then removes all of the debris within the lines. Dirt, rocks, vegetation and other debris is removed clearing the way for a smoother and flatter driveway.
  6. make sure  proper finishing techniques  are used, do not add water to the  surface of the concrete ever. Do not over water the  concrete in the ready mix truck
  7. Utilities are marked: Outdoor power, gas  lines, telephone/WiFi lines and water lines may be in the layout. Miss Utility  will mark them clearly and protect them from being impacted.
  8. Metal forms are best : These are walls that  are straight and on grade so that when concrete is placed, they won’t move or expand.
  9. Grading of soil: Driveways need to  be 6 inches thick. Thus, fill material is added  as need to obtain a consistent thickness
  10. Fill material is compacted: Your concrete driveway paving contractor then uses a plate compactor, using water to mold it, to compact the base materials
  11. Reinforcing steel or polypropylene fiber added into the concrete is installed: These bars are laid before the concrete is  placed .
  12. Concrete is placed: Then your contractor, using a concrete ready mix truck, places the  plastic concrete into the layout.
  13. Slab is completed: The construction team then uses brooms or other tools to make it as flat as possible.
  14. Concrete is cured: Your contractor then applies either a curing compound or a burlap sheeting so that it drys but not too quickly. Typically it takes around seven days to dry and be ready for use.

Your new driveway is a precise operation which requires a licensed concrete paving contractor. Once you have done it, you will have a driveway you can be proud of, use often and will add to the value of your home.

M Taylor Enterprise’s experienced concrete driveway construction team will visit your home in the Silver Spring, Maryland, Montgomery County, Maryland, Prince George’s County, Maryland and parts of Howard County MD. We can give you a consultation on it. We get the job done quickly and efficiently. Call us for concrete construction and repair at (301) 649-3406 or email us at matt@mtaylorenterprise.com.
Francisco castellano riceve kevin hernandez, campione nazionale di bodybuilding naturale nella sua categoria e campione assoluto wnbf spagna 2021-valsequillo de gran canaria consiglio comunale anabolizzanti bodybuilding master in tecniche di fitness, bodybuilding, bodybuilding e nutrizione avanzata (distanza) da anef training di tecnici fitness – iberestudios.

Concrete Repair: How It’s Done

You see it every day when you walk to your car or get the mail. It’s embarrassing and can even be dangerous.

We are talking, of course, about the cracks in your sidewalk, walkway or driveway. Those cracks, which are caused by weather, automobiles, animals, age and just constant usage, take away from the appearance and value of your home. Sidewalk cracks may even cause serious injuries to family members and visitors.

These are common repairs and can be done correctly and efficiently with the right tools, materials and basic understanding of how concrete works. Here are the step-by-step directions to do concrete repair:

  1. Do a properly tamped base. Gas power tamper worksbut use a small roller.
  2. Make sure the reinforcement is up in the concrete and not laying on the ground. We use re-bar on high chair instead of wire mesh.
  3. Proper slump and don’t add too much water. A strong concrete mix is weakened with the overuse of mixing water. If you need to use a higher slump. (Get the correct ad mixture.)
  4. Thickness is so important! We always make our concrete driveways 6” thick.
  5. Proper control and expansion jointsare tooled in and are generally only an inch or so. We saw cut joints deeper the next day after the placement.
  6. Joints need to be at least 1/4 the thickness of the slab. We do 1/3 the thickness of the slab for control joints
  7. Never ever apply water during the finishing process! It weakens the surface cement/water matrixand leads to spalling surface. Please note that if you can’t finish the concrete without the use of adding surface water, you are placing too much concrete or you are short on finishers.
  8. Now apply a curring compound after the concrete placement finishing operations. Spray or roll on helps even in cool weather.
  9. When you strip forms, back-fill around the slab edges with saved soil from the excavation process. Cut and piece in sod at the disturbed areas, when possible.
  10. If you run into unexpected issues such as clay that is pumping and won’t tampor there are old stumps or unexpected old layers of concrete, then the concrete repairs will require the services of an experienced craftsman.
  11. If you end up botching the entire job, don’t fret. Just take it out and have a professional replace it

It’s a pretty involved procedure and requires a lot of detailing and no step can be skipped. Be sure you have ALL the tools and materials before you begin. Also, check the weather forecast for the day you do the repairs. Rain or storms definitely will delay your project. Make sure it is a clear day and not too cold or hot.

However, if this seems too involved or not something you’d like to tackle, then call our professional concrete repair team at M Taylor Enterprise. We can give you an estimate, send a team out to your home or business location and get the job done quickly and efficiently. Call us at (301) 649-3406 or email us at matt@mtaylorenterprise.com.